Offset symmetry in Zbrush
Here's a quick tip regarding symmetry in ZBrush.
You may have noticed that while working on a model with multiple subtools, the symmetry axis is defined around the bounding box center of the entire model.
Enabling the floor button will give you an idea where the center of your model is.
But sometimes you want to work with symmetry off the central axis, or maybe based on the center of one the subtools, so you can work on it symmetrically.
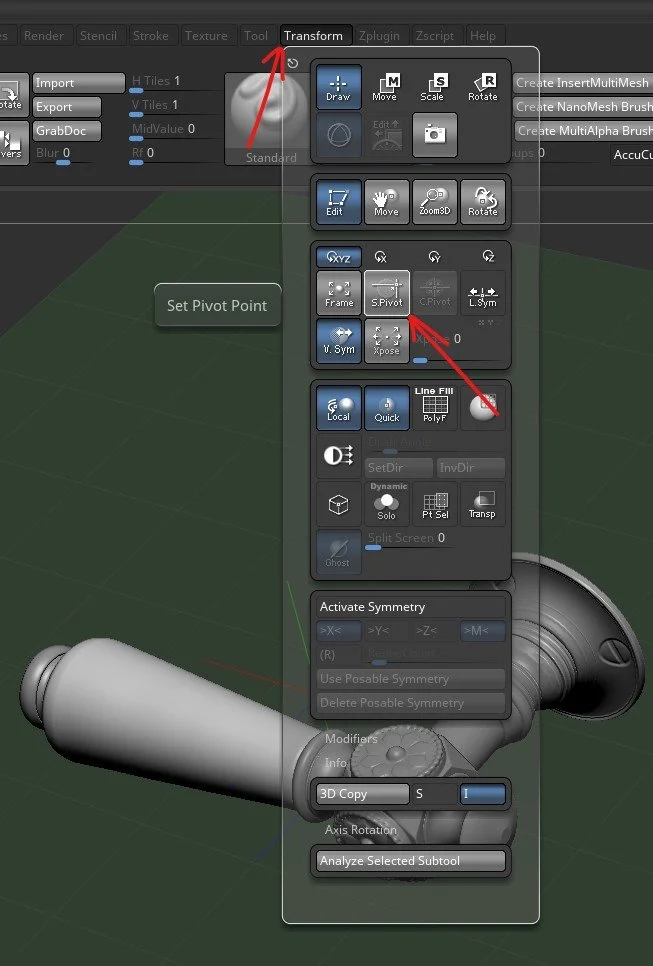
That's where the Set Pivot Button wil help you. It's located under Transform > S.Pivot on the top toolbar.
S. Pivot button with the companion Clear Pivot button.
When pressed, the "center of your scene" will shift to the center of the active polygons. It may look like you broke the position of the active subtool, but that's not the case. Working on Solo Mode while a custom pivot is set is a good idea.
Notice how the center of your scene is now at the center of the highlighted subtool.
You can now work symmetrically on one of your subtools.
This allows you to work symmetrically on subtools pieces, or even use radial symmetry if required, and when you're done, just press the Clear Pivot button to revert back to the default pivot of your scene. You can even use the Select Brushes to hide parts of your model before pressing the S. Pivot Button to more accurately define the temporary pivot placement.
That’s it for this quality of life tip.
See you next mission.


